BLT Tomato Bites (Gluten Free)

BLT Tomato Bites

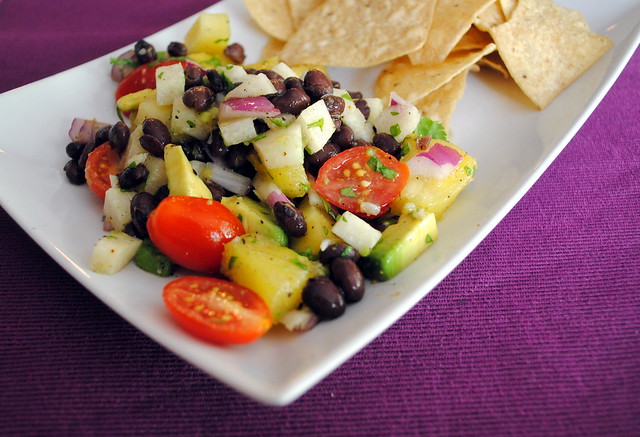
These are the tastiest little bites I’ve had in a while. Tomatoes are in their prime at the moment and I suggest you make these as soon as you can! Every single bite was a little bit sweet, a little bit salty, a little bit spicy, and a whole lot of delicious.

I have been attempting to make these nearly all summer, but seemed to encounter a Goldilocks dilemma every single time. Definitely make sure you get actual cherry tomatoes. I made the mistake of buying a Costco sized box of grape tomatoes, twice, and they are just too small. Then I tried Campari tomatoes and they are just too big, but finally I actually found cherry tomatoes! And they are just right. I used the small end of a melon baller to ‘pit’ the tomatoes and it was the easiest thing ever.

You can use just about any hot sauce you want. I personally used chipotle Tabasco for just about everything and it was absolutely perfect for these. I am sure your personal favorite will work just fine. I think sriracha or a Mexican hot sauce, like Cholula or Tapitio, would be great as well.

BLT Tomato Bites (Gluten Free)

  • 2 pints cherry tomatoes (about 32)
  • 6 slices bacon, cooked crisp and broken into big pieces
  • 1/2 cup mayonnaise or plain Greek yogurt (I used half and half of each)
  • 2 teaspoons of your favorite hot sauce (I recommend Chipotle Tabasco)
  • 1 cup finely chopped romaine lettuce leaves from the heart
  1. Cut off the stem ends of the tomatoes and discard. Using a paring knife or the small end of a melon baller, remove the seeds and discard; place the tomatoes cut side down on paper towels to drain.
  2. Stir together the mayonnaise/yogurt and chipotle and spoon into a resealable bag. Cut off the tip of one corner.
  3. Place the tomatoes cut side up on a platter and press some romaine inside each tomato; sprinkle with salt. Pipe some chipotle mayo over the romaine and top with bacon.

Pineapple Jicama Salad with Cilantro Vinaigrette

Pineapple Jicama Salad

This salad is sweet, tangy and delicious. I originally read a similar recipe in a magazine while sitting in the waiting room at my dentist’s office. I was intrigued because I love love pineapple, but it had cucumber in it, which I absolutely abhor! Cumber is one of the four foods in the world that turn me into a picky eater toddler throwing a tantrum at the dinner table. I will not eat them. I do not like them touching my food and I will sit and pout if they are near my plate (bananas, celery and eggplant would be the others). I have been using a lot of jicama this summer and thought that it would make a great substitute for cucumber. It has the same kind of crunchy texture.

I served this salad with a side of chips for a super chunky chips and salsa kind of thing. You could also serve it over a bed of mixed greens or it would also go great with some grilled shrimp or tequila lime chicken as well.

Pineapple Jicama Salad

Pineapple Jicama Salad with Cilantro Vinaigrette

Ingredients

For the Vinaigrette:
  • 2 Tablespoons fresh lime juice
  • 2 Tablespoons rice vinegar
  • 1 bunch fresh cilantro, minced
  • 1/2 teaspoon salt
  • 1/4 teaspoon ground black pepper
  • 1/4 teaspoon ground cayenne pepper
  • 2-4 Tablespoons olive oil (I used 3)

For the salad:

  • 1/2 fresh pineapple, peeled, cored, and cut into chunks
  • 1 small jicama, peeled and diced into cubes
  • 1 small red onion, finely diced
  • 1 (15-ounce) can black beans, drained and rinsed
  • 1 cup cherry tomatoes, halved
  • 1 avocado, pitted and diced

Instructions

For the Vinaigrette:
  1. Combine all the ingredients in a bowl and whisk together until well blended. Set aside. (Vinaigrette can be made ahead of time and will keep in the fridge for about 1 week.)
For the salad:
  1. Combine all ingredients, except the avocado, in a bowl and mix together. Add desired amount of vinaigrette and toss to coat. Salad can now be kept in fridge for up to 4 hours or served immediately.
  2. Right before serving add avocado and gently toss to to coat avocado with dressing, but be sure not to mush it too much.

Gluten Free BLT Spring Rolls

Gluten Free BLT Spring Rolls

I love coming up with new ways to eat my favorite sandwiches in gluten free ways. A good BLT (I guess these are technically BLATs) are pretty amazing sandwiches and these spring rolls do not disappoint despite the lack of bread. The lime-sriracha dipping sauce is also pretty delicious. It’s creamy, spicy and tangy and really worked well the rest of the BLT ingredients.

These rolls are also super, super filling. I had originally planned on using these as an appetizer, but they were so tasty and filling, they ended up being the perfect (almost) no cook meal. I would recommend serving these as soon as possible after making them, but if you have to they will keep pretty well for up to three hours after assembly.

Gluten Free BLT Spring Rolls

Gluten Free BLT Spring Rolls
From No Thanks to Cake.

Ingredients

For the Dipping Sauce:
  • 2 Tablespoons mayo
  • 2 Tablespoons Greek yogurt
  • 2 Tablespoons lime juice
  • 1-5 teaspoons Sriracha or garlic chili sauce (depending on you spice preference)
For the Spring Rolls:
  • 8 8-inch rice paper (spring roll) wrappers
  • 2 cups baby lettuce/spring mix
  • 2 large tomatoes, cut into thin slices
  • 8 slices crispy, cooked center-cut bacon
  • 1 avocado, pitted and cubed

Instructions

For the Dipping Sauce:
  1. Combine the mayo, yogurt, lime, and sriracha in a small bowl. Whisk it together and set aside.
For the Spring Rolls:
  1. Make an assembly line with the bacon, tomato avocado and lettuce. (These spring rolls are best when served immediately, but can be served up to 3 hours later)
  2. Fill a large pan with hot water and add one rice paper round. Allow it to sit in the water until it softens, about 15-30 seconds. (If your rice paper has a pattern on it, it will be ready to remove when the pattern disappears.)
  3. Stack shredded or baby lettuce leaves on the lower third of the rice paper. Add tomatoes then a strip of bacon.
  4. Fold the bottom of the rice paper up over the lettuce, tomato and bacon. Fold in the sides, then roll up. Repeat with remaining ingredients. If one of the wrappers rips, carefully overlap the two edges then continue to assemble the roll.
  5. Cut each roll in half. Serve with dipping sauce.

Halloumi, Snap Pea & Tomato Quinoa Salad

Halloumi, Snap Pea, Tomato & Quinoa Salad

I’ve been on a bit of a halloumi kick lately. Normally I would feel bad about sharing recipes with ‘exotic’ ingredients in them, like halloumi, but now that Trader Joe’s now sells this amazing cheese, I would hardly count it as exotic anymore.

This salad is not only quick and easy to make, it is delicious too. The snap peas and tomatoes around here are absolutely delicious at the moment. Their sweetness combined with the salty halloumi help makes every bite delicious. The dressing is light and flavorful. It really adds to the salad and helps all the delicious flavors come together.

Halloumi, Snap Pea, Tomato & Quinoa Salad


Halloumi, Snap Pea & Tomato Quinoa Salad

For the Dressing:
  • 4 Tablespoons plain Greek yogurt
  • 2 Tablespoons lemon juice
  • 1/2 Tablespoon fresh parsley, minced
  • 1/2 Tablespoon fresh basil, minced
  • 1/2 Tablespoon fresh chives, minced
For the Salad:
  • 2 teaspoons olive oil
  • 1 pack Halloumi, cut into slices
  • 1/2 pound cherry tomatoes
  • 4 ounces snap peas, cut into pieces
  • 12 ounces mixed spring greens
  • 2 cups cooked quinoa
  1. Combine all ingredients for the dressing in a small bowl. Mix to combine and set aside.
  2. In a large pan heat the olive oil over medium-high heat. When oil is hot, add halloumi and cooked until golden brown, about 2-3 minutes. Flip and repeat on the other side. Place cooked halloumi on paper towels to drain excess oil.
  3. In a large bowl, combine greens, snap peas and tomatoes and about half the dressing. Toss to mix all the ingredients.
  4. Divide between 4 serving bowls. Top with about 1/2 cup of the cooked quinoa and 2-3 slices of the halloumi and serve.


Zucchini Noodles with Cilantro Pesto & Halloumi AND a Giveaway!

Zucchini Noodles with Cilantro Pesto & Halloumi

Disclosure: The Veggetti®, gift card, information, and additional gift pack have been provided by Ontel. All thoughts and opinions are my own. 

I have wanted to get a spiralizer for a while now, but the cost, size and valuable kitchen storage space it would take up always prevented me. Enter the Veggetti! The Veggetti is a handheld device that quickly turns your veggies into veggie noodles. Veggie noodles offer not only a healthier, lower-carb alternative to regular pasta, but a gluten free one too. The Veggetti is also quick and easy to use and it’s dishwasher safe, which makes clean up a breeze.

I have used my Veggetti with zucchini, squash, potatoes, and carrots. All of them worked out perfectly, except for the carrots. I think the carrots I tried to use were too narrow. So far I am really impressed by how easy the Veggetti is to use, how sturdy it is and how small it is. It fits perfectly in a kitchen drawer. The only downside I have found, and it’s kind of a silly one, is how insanely long the noodles are. I would definitely recommend cutting them up once you are done spiralizing them.

If you would like to get your own Veggetti® , you can go here to learn more at www.getveggetti.com OR you can enter my giveaway! One reader will win a Veggetti of their very own – plus a $25 Visa Gift Card to stock their vegetable crisper!

TO ENTER: 

a Rafflecopter giveaway


Zucchini Noodles with Cilantro Pesto & Halloumi

  • 1 zucchini
  • 1 summer squash
  • 1 pack of halloumi cut into slices
  • 1 teaspoon olive oil
  • 1/2 cup cherry tomatoes
  • 1/4 red onion, diced
  • 1/4 cup kalamata olives, halved
For the Cilantro Pesto:
  • 1/4 cup blanched almonds
  • 4+ garlic cloves, minced
  • 1/4 cup cotija cheese (or parmesan), grated
  • 1 bunch cilantro, with most of the stem removed
  • 1/4 cup olive oil
  • 1/2 of a lemon, juiced
  • 1 generous pinch red chili flakes (optional)

Instructions

  1. Use the Veggetti to spiralize the zucchini and squash and set aside.
  2. In a medium skillet, heat the olive oil over medium-high heat. When oil is shimmering, add halloumi and cook until golden brown, about 3 minutes. Flip and repeat on the other side. Place on a paper towel to drain.
  3. In a large bowl, toss the zucchini noodles with as much cilantro pesto as you like and the rest of the ingredients, except the halloumi. Divide between two plates and top with halloumi and serve.
  4. For the Pesto
  5. Place the almonds in a food processor until they are finely ground. Add the remaining ingredients and pulse until desired consistency is reached.

Tomato Basil Spread

Basil Tomato Spread

A few weeks ago I was up visiting my best friends and her husband and pugs in San Francisco. They have the cutest farmers’ market right around the corner from them on the weekends and we took a visit before I had to head home. One of the stalls (Hummus Heaven) was selling absolutely delicious hummus and pita chips. They also had some incredible dips and spreads. I fell in love with the tomato basil spread. It was light, tangy, garlicky and fresh. It was delicious with pita chips, but I also used it for dipping veggies, crackers and as a sandwich spread. All wining combinations.

Since I (tragically) have no clue when my next visit to San Francisco will be, I decided I needed to attempt to recreate it. I will say that the original was a little more creamy (almost mayo/aioli like), but I wasn’t really in the mood to keep adding oil or mayo to get mine to the same consistency. I thought that some greek yogurt might take it more in that direction, but it didn’t. It did help it make it more like a dip or sandwich spread, which was perfect for me. I did save a little of the original to do a side by side taste test and that my version is  just as good as the original, if not a little bit better.

Tomato Basil Spread

  • 4+ cloves garlic
  • 6 ounce can tomato paste
  • freshly ground pepper, to taste
  • 4 sprigs fresh thyme leaves
  • 1/2 teaspoon oregano, dried
  • 10-15 basil leaves, roughly torn
  • 1 Tablespoon olive oil
  • 1/2 cup greek yogurt, plain
  1. Combine all ingredients in a food processor and pulse to combine until desired consistency is reached (I did mine so it was very smooth).


Slow Roasted Tomatoes with Goat Cheese & Gluten Free Focaccia

Oven Roasted Tomatoes with Goat Cheese & Gluten Free Focaccia

Summer seems to be flying by and I feel like the end of it, is unfortunately in sight. This week I want to share recipes that feature some of my favorite summer produce so everyone can get as much tasty enjoyment out of the month or so we have left.

Oven roasted tomatoes became one of my favorite things this summer and if I can keep some around long enough (most are consumed via fork straight from pan), this is one of my favorite ways to eat them. I know turning on the oven in the middle of summer is something only crazy person would do, but just trust me, it’s worth it. Plus, you are turning on the oven so low, you won’t be able to notice any big temperature change. I promise!

I cannot even begin to describe how incredibly delicious these tomatoes are. I used cherry tomatoes in this particular instance, but I’ve used just about every tomato imaginable and they are all just as amazing. I served these with softened goat cheese and gluten-free focaccia, but the possibilities are endless. I’ve used them on salads, in a caprese salad, the top of soups, crackers and, as I already mentioned, my favorite method with a fork straight from the pan.

One minor note, if you are using larger tomatoes: cut the tomatoes in half first, remove the stem (if desired) and place them cut side down on the pan when you go to roast them.

Slow Roasted Tomatoes with Goat Cheese & Gluten Free Focaccia

  • around 1-1.5 pounds cherry tomatoes
  • 2 Tablespoons olive oil
  • 8-10 sprigs fresh thyme
  • 4-5 sprigs fresh rosemary
  • 4-8 cloves garlic, very thinly sliced
  • Kosher salt and freshly cracked pepper
  1. Heat oven to 225F.
  2. Pour the olive oil into a shallow baking dish or pan and add the garlic, thyme, rosemary, and salt and pepper.
  3. Toss the tomatoes with the oil and seasonings in the dish.
  4. Bake for two hours, or until the tomatoes are completely softened and wilted, and start to wrinkle. Depending on the tomatoes, they may take longer to cook.


Easy Vegetable Frittata

Easy Vegetable Frittata

This week I am sharing some of favorite brunch recipes. I absolutely love brunch and summer weekends seem to just demand them. These recipes don’t demand too much cook and can mostly be prepared ahead to time, which gives you more time to relax, enjoy your weekend and enjoy some extra mimosas with your friends.

This frittata is pretty much perfect if you ask me. It’s easy to make, it can help you clean out your vegetable drawer and it reheats wonderfully. I just used the vegetables I had on hand, but you can add just about anything you want to this frittata. Broccoli, bell peppers, jalapeños or fresh herbs, like basil or chives, would all be great additions.

Easy Vegetable Frittata

Ingredients

  • 1 Tablespoons olive oil
  • 1 onion, diced
  • 1 bunch green onions, chopped
  • 2+ cloves garlic, minced
  • 6+ large mushrooms, cleaned and sliced
  • 1 tomatoes, chopped with seeds removed
  • 1 cup baby spinach, roughly torn or chopped
  • 1 cup shredded cheese (I used extra sharp cheddar)
  • 6 large eggs
  • salt and freshly ground black pepper, to taste

Instructions

  1. Heat the oven to 375 degrees F. Grease a baking dish (I used a 9 inch pie dish).
  2. Heat 1 tablespoon olive oil in a large skillet over medium heat. Add the onions and sauté until beginning to brown. Then add the green onions, mushrooms and garlic and cook until mushrooms begin to soften, about 5 minutes. Add tomatoes and spinach. Sauté for an additional 1 to 2 minutes or just until the spinach is wilted. Season the vegetables with salt and pepper.
  3. In a medium bowl, beat together the eggs, cheese, salt, and pepper.
  4. Finish cooking in the oven for 25-35 minutes, until the eggs have completely set in the center.

The World’s Best Tomato Soup!

I am going to make a bold statement right now and say this is the best tomato soup I have ever had. Ever. EVER! I consider myself a bit of tomato soup connoisseur and I thought I had found the only recipe I needed for the rest of my life, but I was sorely miss informed. I could happily eat this every day for the rest of my life and not even care. This soup was sooooooo good it inspired me to blog again. This is a very simple recipe, but when you let all the ingredients get friendly, it turns into an extraordinary soup.

This is not the world’s fastest soup, but you really do not want to rush it. The more time you give it the more flavorful it will be, and trust me! It’s worth it. There are so many flavors in this soup and they way the all come together is absolutely amazing, but it takes a little bit. Taking the time to fully caramelize the onions is essential. Luckily, since the onion is diced, it takes a little less time than caramelizing normally does (25-30 minutes). I made gluten-free Black Pepper and Cheddar Biscuits with a Chebe mix that were the perfect addition to the meal.

The World’s Best Tomato Soup!

Ingredients

  • 1 Tablespoon olive oil
  • 1 large onion, finely diced
  • 6+ garlic cloves, minced
  • ¼ cup dry vermouth
  • 2 cups low-sodium vegetable stock
  • 2 large (28 ounce) cans whole tomatoes (splurge on the good ones!)
  • 3 Tablespoons tomato paste
  • 1-2 Tablespoons dried Italian herbs
  • Freshly ground pepper and salt, to taste
  • Fresh basil, chopped, for garnish

Instructions

  1. Heat olive oil in a large, heavy pot over medium heat.
  2. Add onion and continue to cook until caramelized, about 25-30 minutes.
  3. Stir in garlic and cook until fragrant, about 2-3 minutes.
  4. Add the vermouth and stir everything around to deglaze the pot. Let cook for 2 minutes.
  5. Add the vegetable stock and let simmer for 5 minutes.
  6. Add the tomatoes, tomato paste, and Italian herbs and stir until well mixed and let simmer for 20 minutes.
  7. Using an emersion blender, blend together all of the ingredients. (A food processor or blender will work as well)
  8. Cook about 10 minutes longer to all the soup to reduce and thicken up.
  9. Serve and enjoy!

Shrimp Louie Salad

Shrimp Louie Salad

The Crab Louie has been a San Francisco classic since the early 1900s. Since there has been no crab around this kitchen since the infamous crab cake incident of 2011, I substituted the only shellfish that has yet to make an attempt on my life, shrimp! I’ve never actually had a shrimp/crab Louie before, so I don’t have basis for comparison, but this salad was delicious. It made an extremely enjoyable and beautiful lunch. It might seem like there are a lot of ingredients, but it came together very easily.  I definitely plan on make it again. I think it would be perfect for a fancy luncheon or if you have guests.

A traditional Louie salad involves hard-boiled eggs, but since cannot stand the sight or texture of egg yolks, I left them out. They definitely were not missed. I also used kalamata olives instead of regular black olives, mainly because they were what I had on hand, but they also provide way more flavor. Every other ingredient was fresh and crisp. Living in Southern California, we get amazing produce year round. Tomatoes and avocados are at their prime and we are still lucky enough to find great asparagus at farmers’ market.

The dressing is similar to 1000 Island dressing, but not quite. I read at least 20 different Louie dressing recipes and in the end just picked the ingredients that sounded best to me. I like my dressings on the tangy side and most of them sounded like they would be pretty sweet. I used chili sauce, which I think is super sweet to begin with, so I did not add any extra sugar. I also used dill pickle relish and more lemon juice than most called for. This helped to cut the sweetness (it still had some, but not too much) and thinned out the dressing. Gloopy dressing is never a good thing. I also added Worcestershire sauce, Tabasco and paprika for color and flavor.

Shrimp Louie Salad


Shrimp Louie Salad

For the Louie Dressing:

  • 1 cup high-quality mayonnaise
  • 1/3 cup ketchup or chili sauce
  • 2 lemons, juiced
  • 3 cloves garlic, minced
  • 2 Tablespoons dill pickle relish
  • 1 Tabelspoon Worcestshire sauce
  • 1 teaspoon Tabasco
  • 1 teaspoon paprika
  • 1/2 teaspoon chili powder
  • Kosher salt and freshly ground pepper, to taste
For the Shrimp:
  • 12 shrimp, peeled, deveined, and tail removed
  • 1 tablespoon extra virgin olive oil
  • 1 lemon, juiced
  • 2 cloves garlic, minced
  • kosher salt and freshly ground pepper, to taste
For the Salad:
  • 1/2 head iceberg lettuce, finely chopped (almost shredded)
  • 1/4 pound asparagus, blanched
  • 2 fresh tomatoes, cut into quarters,
  • 1 avocado, peeled, pitted, and sliced lengthwise thinly
  • 1/4 red onion, finely diced

Instructions

For the Dressing:
  1. In a bowl, whisk together all ingredients. Add salt and pepper to taste. Place in fridge while cooking shrimp and assembling salad.
For the Shrimp:
  1. Heat oven to 400F. Combine shrimp and all other ingredients in a small bowl or plastic bag. Toss to coat. Place the shrimp on a rimmed baking sheet. Roast in the oven for 6-7 minutes, or until shrimp are nice and pink. Let cool slightly while you assemble the salad.
For the Salad:
  1. Divide lettuce between two plates. Divide the rest of the ingredients between the plates of lettuce. Serve with dressing on the side and enjoy!

Shrimp Louie Salad