Halloumi & Bacon Rolls

Halloumi & Bacon Rolls

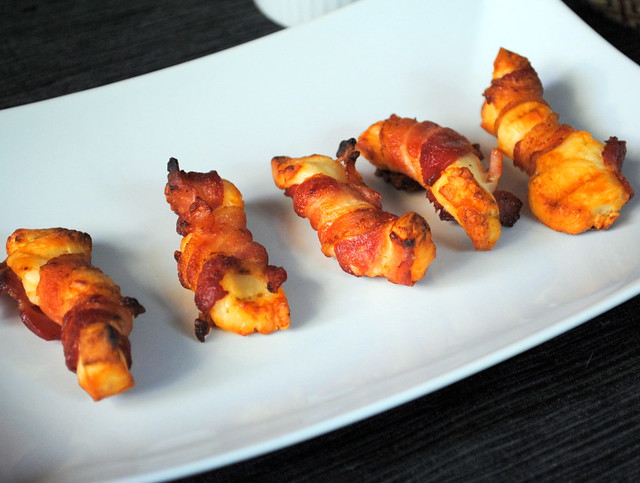
Oh my goodness. These are amazing. Quick warning, you should probably make a double batch of these because they are not going to be around for long. I mean, cheese and bacon, what’s not to love? Nothing obviously.

Whether you are having friends over to watch football or hosting a fancy dinner party, these little bites are sure to be a hit. I highly recommend letting these get nice and brown and crispy (soggy bacon is just nasty). I served mine with Dijon mustard just to add a little extra something. Totally not necessary, but definitely a tasty addition. I’m a saucy person, so I like having dipping sauces on the side of just about everything. I think a smokey barbecue sauce would also be really tasty.

Halloumi & Bacon Rolls

  • 1 block halloumi
  • 10 rashers of center cut bacon


  1. Heat oven to 400. Line a baking sheet with tinfoil and place a baking rack on top of the tinfoil.
  2. Cut the halloumi into 20 sticks. stretch each rasher of bacon with the back of a knife, then cut in half.
  3. Roll the bacon around the halloumi in a spiral and arrange on the baking rack. Bake for 15-20 mins or until the pancetta is brown and crispy.

BLT Tomato Bites (Gluten Free)

BLT Tomato Bites

These are the tastiest little bites I’ve had in a while. Tomatoes are in their prime at the moment and I suggest you make these as soon as you can! Every single bite was a little bit sweet, a little bit salty, a little bit spicy, and a whole lot of delicious.

I have been attempting to make these nearly all summer, but seemed to encounter a Goldilocks dilemma every single time. Definitely make sure you get actual cherry tomatoes. I made the mistake of buying a Costco sized box of grape tomatoes, twice, and they are just too small. Then I tried Campari tomatoes and they are just too big, but finally I actually found cherry tomatoes! And they are just right. I used the small end of a melon baller to ‘pit’ the tomatoes and it was the easiest thing ever.

You can use just about any hot sauce you want. I personally used chipotle Tabasco for just about everything and it was absolutely perfect for these. I am sure your personal favorite will work just fine. I think sriracha or a Mexican hot sauce, like Cholula or Tapitio, would be great as well.

BLT Tomato Bites (Gluten Free)

  • 2 pints cherry tomatoes (about 32)
  • 6 slices bacon, cooked crisp and broken into big pieces
  • 1/2 cup mayonnaise or plain Greek yogurt (I used half and half of each)
  • 2 teaspoons of your favorite hot sauce (I recommend Chipotle Tabasco)
  • 1 cup finely chopped romaine lettuce leaves from the heart
  1. Cut off the stem ends of the tomatoes and discard. Using a paring knife or the small end of a melon baller, remove the seeds and discard; place the tomatoes cut side down on paper towels to drain.
  2. Stir together the mayonnaise/yogurt and chipotle and spoon into a resealable bag. Cut off the tip of one corner.
  3. Place the tomatoes cut side up on a platter and press some romaine inside each tomato; sprinkle with salt. Pipe some chipotle mayo over the romaine and top with bacon.

Gluten Free BLT Spring Rolls

Gluten Free BLT Spring Rolls

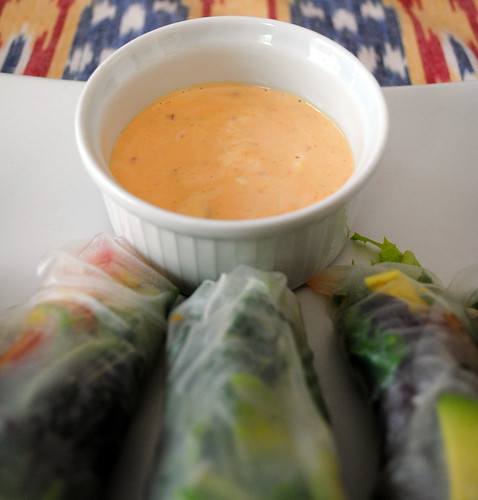
I love coming up with new ways to eat my favorite sandwiches in gluten free ways. A good BLT (I guess these are technically BLATs) are pretty amazing sandwiches and these spring rolls do not disappoint despite the lack of bread. The lime-sriracha dipping sauce is also pretty delicious. It’s creamy, spicy and tangy and really worked well the rest of the BLT ingredients.

These rolls are also super, super filling. I had originally planned on using these as an appetizer, but they were so tasty and filling, they ended up being the perfect (almost) no cook meal. I would recommend serving these as soon as possible after making them, but if you have to they will keep pretty well for up to three hours after assembly.

Gluten Free BLT Spring Rolls

Gluten Free BLT Spring Rolls
From No Thanks to Cake.

Ingredients

For the Dipping Sauce:
  • 2 Tablespoons mayo
  • 2 Tablespoons Greek yogurt
  • 2 Tablespoons lime juice
  • 1-5 teaspoons Sriracha or garlic chili sauce (depending on you spice preference)
For the Spring Rolls:
  • 8 8-inch rice paper (spring roll) wrappers
  • 2 cups baby lettuce/spring mix
  • 2 large tomatoes, cut into thin slices
  • 8 slices crispy, cooked center-cut bacon
  • 1 avocado, pitted and cubed

Instructions

For the Dipping Sauce:
  1. Combine the mayo, yogurt, lime, and sriracha in a small bowl. Whisk it together and set aside.
For the Spring Rolls:
  1. Make an assembly line with the bacon, tomato avocado and lettuce. (These spring rolls are best when served immediately, but can be served up to 3 hours later)
  2. Fill a large pan with hot water and add one rice paper round. Allow it to sit in the water until it softens, about 15-30 seconds. (If your rice paper has a pattern on it, it will be ready to remove when the pattern disappears.)
  3. Stack shredded or baby lettuce leaves on the lower third of the rice paper. Add tomatoes then a strip of bacon.
  4. Fold the bottom of the rice paper up over the lettuce, tomato and bacon. Fold in the sides, then roll up. Repeat with remaining ingredients. If one of the wrappers rips, carefully overlap the two edges then continue to assemble the roll.
  5. Cut each roll in half. Serve with dipping sauce.

Spring Wedge Salad with Carrots, Radishes & Bacon

Spring Wedge Salad with Carrots, Radishes & Bacon

I have said it before, and I will say it again, brunch is my favorite meal. It’s really just great. When it comes to breakfast foods, I kind of have an aversion to sweet and bready things and egg dishes can get a bit boring*, but if I’m at brunch, it means I can totally order a salad at 9 in the morning and it’s not weird. This salad is perfect for brunch or lunch or dinner. I would eat it for any meal really.

Wedge salads are one of my favorite salads and this is such a delicious spring twist on a traditional wedge salad. I was able to get all the ingredients at my farmers market, which made it feel even more seasonally appropriate. The flavors in this salad also worked really well together. I really like the vinaigrette dressing instead of a traditional  blue cheese or ranch, which would have been way too heavy for this salad. The blue cheese crumbles gave the salad a bit of creaminess and tanginess, so you really don’t miss the traditional dressing at all. This was my first time trying radishes and I was hoping that they would be a bit more peppery, they were still a good addition to the meal.

Next time, there is only one thing I would do differently. I would make sure to cut the radishes and carrots as thinly as possible. Even though I used a mandoline to cut them this time, they were still quite thick (my fingers and I don’t have the best track record with the mandoline, so I try not to mess around with it too much) and it made them a bit difficult to chew compared to the rest of the ingredients. I think the carrots would probably be best done thinly with a vegetable peeler and maybe the radishes too.

* – there is one brunch dish and only one brunch dish that combines sweet, bready and eggy that I absolutely love and I’ll be posting it later in the week. Trust me, it is definitely worth the wait!

Spring Wedge Salad with Carrots, Radishes & Bacon
Adapted from Better Homes and Gardens.

Ingredients

  • 1 head iceberg lettuce
  • 6 slices bacon, crisp-cooked and halved
  • 3 carrots, thinly sliced
  • 2 green onions, chopped
  • 6 radishes, sliced and/or chopped
  • 1/2 cup crumbled blue cheese
  • 1/4 cup olive oil
  • 1/4 cup red wine vinegar
  • 3 cloves garlic, mashed
  • 1/4 teaspoon salt
  • 1/4 teaspoon coarse ground black pepper

Instructions

  1. Trim stem from lettuce while leaving the core intact. Cut lettuce in quarters then place the wedges on individual serving plates. Arrange bacon, carrots, green onions, and radishes on and around each wedge. Sprinkle each wedge with blue cheese.
  2. In a screw-top jar combine olive oil, vinegar, garlic, salt, and pepper. Cover tightly and shake until combined. Immediately drizzle over salad.
Lentil, Olive & Goat Cheese Salad

Lentil Goat Cheese Salad

This salad wasn’t really planned out. I set about making lunch one day, but was in one of those moods where nothing really sounded good. After hemming and hawing for a bit, I ended up grabbing several random ingredients. Anything I saw that seemed appealing at the time got put on the counter. Not surprisingly these basic ingredients are some of my favorites. Feeling accomplished about picking out items for lunch, I then realized I still had to figure out what to do with them. This salad is what ended up happening. Nothing too fancy, but delicious and filling nevertheless.

I don’t like overly oily salad dressing, so I just mixed lemon juice into the lentils instead of making an actual dressing. And olive oil  lemon dressing or a light vinaigrette could definitely be used on the lettuce or lentils if you like. If you are looking for something a little warmer for this time of year, the lentils could also be served warm with all the ingredients mixed in. If serving warm, I would leave out the lettuce and substitute a bed of sautéed spinach.

Lentil Goat Cheese Salad


Lentil, Olive & Goat Cheese Salad

For the Lentils

  • 1 cup dried green, brown, or French lentils
  • 2 cups low-sodium vegetable broth or water
  • 1 bay leaf, 1 garlic clove, or other seasonings (optional)
  • 1/4 – 3/4 teaspoon salt
For the Salad:
  • 1 head butter lettuce, torn into bite-sized pieces
  • 1 small red onion, diced
  • handful of kalamata olives, chopped
  • 1 tomato, diced
  • juice of 1 lemon
  • olive oil (optional)
  • 4 ounces soft goat cheese, crumbled
  • bacon or pancetta, cooked until crispy and crumbled

For the Lentils:

  1. Wash Lentils in a strainer or colander. Pick over and remove any shriveled lentils, debris, or rocks. Thoroughly rinse under running water. Then transfer the rinsed lentils to a saucepan and pour in the broth/water. Add any seasonings being used, reserving the salt.
  2. Bring the broth/water to a rapid simmer over medium-high heat, then reduce the heat to maintain a very gentle simmer. Cook, uncovered, for 20-30 minutes. Add water as needed to make sure the lentils are just barely covered.
  3. When lentils are done, remove from pot and allow to cool in a serving dish.
For the Salad:
  1. While the lentils are cooking prepare the rest of the ingredients.
  2. Divide lettuce onto individual serving dishes.
  3. When lentils are cooled, add onion, tomato and olives and top with lemon juice (and olive oil if using). Mix ingredients together. Crumble goat cheese and sprinkle bacon over the top. Divide the lentils between the lettuce plates and serve.

Sweet Onions with Lentil Stew

Sweet onions with lentil stew

This is pure comfort food. It’s hearty and warm, salty and savory, and the flavors intensify with every reheating. It’s perfect for a cold, wet, wintry day. I could eat something like this every day when it’s cold out. Something about lentils are just so ‘homey’. They really are perfect in soups and stews.

My only misgiving about this recipe was the cinnamon. I hate cinnamon (like a tiger), so I was a bit wary of adding it in. I will admit I only used a very scant half teaspoon of cinnamon. I doubled the paprika to attempt to mask the cinnamon at little better. I could still taste it and it wasn’t horrible, but I think I would have enjoyed the dish a lot more without it. Next time I would probably skip the cinnamon all together and just add a lot more paprika. Paprika makes everything better.

Sweet Onions with Lentil Stew
From BBC Food

  • a good handful, chopped unsmoked bacon or pancetta
  • 4 medium sized onions
  • 4 cloves garlic, minced
  • 3 small carrots
  • 1 teaspoon smoked paprika
  • ½ teaspoon ground cinnamon
  • ½ nutmeg, for grating
  • 300g/10oz Puy lentils
  • 1000ml/2 pints stock
  • 100g/4oz crème fraîche/sour cream/greek yogurt
  1. Cook the bacon or pancetta in a deep pan over a moderate heat to let the fat slowly ooze out. Roughly chop two of the onions and add them and the garlic to the pan. Cut the carrots into chunks and add to the pan. Cover and let it steam for a few minutes. Add the paprika, cinnamon, then grate in ½ of the nutmeg. Add the lentils, stock, cover and leave for 30 minutes until the lentils have softened.
  2. While that is slowly cooking, slice the remaining two onions and, in another pan, cook them very slowly in oil until golden brown. Finish with a grate of nutmeg.
  3. The last thing to add to the lentils is a handful of chopped parsley. Serve with a dollop of crème fraiche and pile the caramelised onions on top.

Broccoli & Grape Salad

Roasted Broccoli & Grape Salad

Let’s move on from Thanksgiving left overs…

I was slightly hesitant to mix roasted broccoli and roasted grapes, but since I have had pretty good luck with roasting them separately, I figured combining the two couldn’t be too bad. The roasted grapes gave the salad a caramelized sweetness, but it was subtle. I normally would not like anything sweet in a salad like this, but the tangy, creamy dressing kept it in check. They dressing really brought out the best in the other flavors in the salad.

Roasted Broccoli & Grape Salad


Broccoli & Grape Salad
Adapted from Better Homes & Gardens.

  • 6 cups broccoli florets
  • 2 cups red grapes
  • 1 Tablespoon olive oil
  • 1/4 teaspoon salt
  • 1/4 teaspoon ground black pepper
  • 1/2 cup chopped red onion
  • 1/2 cup mayonnaise or greek yogurt or combination of the two
  • 2 Tablespoons white wine vinegar
  • 2 Tablespoons grainy Dijon mustard
  • 8 slices bacon, crisp-cooked and crumbled
  • 1/2 cup chopped, smoked almonds
  1. Preheat oven to 425 degrees F. Spread broccoli and grapes in a single layer on a 15x10x1-inch baking pan. Drizzle with olive oil, salt, and pepper and toss to coat. Roast, 20 to 25 minutes or until broccoli is starting to brown and grapes are soft, stirring once halfway through roasting time. Remove from the oven and sprinkle with red onion. Cool slightly.
  2. Meanwhile, in a small bowl whisk together the mayonnaise, lemon juice, and mustard. Place broccoli mixture in a serving bowl. Toss with the dressing and top with bacon and smoked almonds.

Gluten Free Brussels Sprouts & Bacon Pizza

Gluten Free Brussels Sprouts & Bacon Pizza

I wanted to make this pizza the second I saw it. I finally got around to it this past week. My brussels sprout obsession has been well documented. Put brussels sprouts and pizza together and I was easily sold. If you are a brussels sprout skeptic, I swear this recipe could make you a convert! If you have already seen the light and love b. sprouts as much as I do, I know this will quickly become a new favorite. I’m currently debating with myself if making it again already is too soon? I don’t think it is.

Gluten Free Brussels Sprouts & Bacon Pizza

I will definitely make this again. I thought that the garlic and onion in the dough made the crust extra tasty and really added to the overall flavor of the pizza. You could easily just mix garlic and onion powder into any pizza dough recipe. I also liked how the brussels sprouts and onions got coated with a bit of a caramelized balsamic glaze. Definitely make sure you toss them in balsamic and olive oil! It makes all the difference. I would also probably leave the bacon off. Bacon just does nothing for me. I don’t understand the obsession at all. Plus, the addition of blue cheese definitely gave the pizza a flavorful, slightly salty bite that could easily replace the need for bacon on it at all.

Gluten Free Brussels Sprouts & Bacon Pizza (adapted from Shutterbean)

  • homemade or store-bought pizza dough (I used Chebe’s Garlic-Onion Breadstick Mix)
  • 3 pieces bacon, chopped
  • 4 cloves garlic, thinly sliced
  • 1 cup mozzarella, shredded
  • 1 cup of shredded Brussels sprouts
  • 1/2 red onion, thinly sliced.
  • 2 tablespoon olive oil, divided, plus more for baking sheet
  • 2 tablespoon balsamic vinegar, divided
  • red pepper flakes
  • salt & pepper
  • 1/4 cup crumbled blue cheese
  1. Preheat oven to 425F.
  2. Prepare a rimmed baking sheet with a cooling rack placed inside, cook bacon in oven for 15-18 minutes. Remove from oven, set aside on a paper towel to drain.
  3. Oil a 13×18 inch rimmed baking sheet liberally with good extra virgin olive oil. Place  the dough on the pan and stretch and press it out to the edges. If it springs back wait a few minutes and then proceed. The dough is very thin. If it tears, piece it back together.
  4. In a small bowl, add 1 tablespoon of olive oil and 1 tablespoon of the balsamic vinegar. Mix together with salt and pepper and brush on pizza dough. In the same bowl add the remaining tablespoons of olive oil and balsamic and toss brussels sprouts and onions in it to coat.
  5. Evenly top the pizza dough with mozzarella, bacon, garlic, red onion, and Brussels sprouts. Add a heavy pinch of red pepper flakes, if desired. Put the pizza in the oven to bake for 15-20 minutes. To serve, top with crumbled blue cheese and serve!