Gluten Free Smoky Black Bean Dip

Smoky Black Bean Dip 
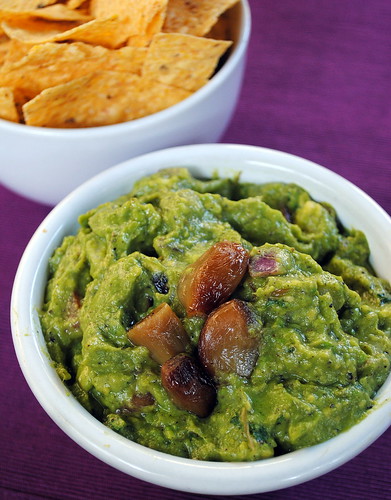
Here’s a quick and easy dip that’s perfect for any of your last minute cinco de mayo needs! All you need is a food processor and a few ingredients that are probably already in your pantry. This dip is easy to make and easy to serve, plus there’s not absolutely no cooking involved, which makes it a perfect summertime dip. I recommend serving it with tortilla chips and veggies, but you could use it with nachos or on quesadillas as well.

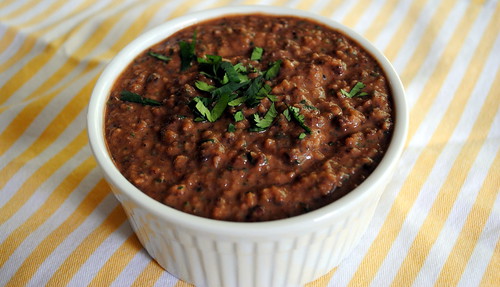
I felt that three chipotles was the perfect amount for this dip. It gave it a nice smoky, spicy taste, but it wasn’t spicy to the point that you couldn’t eat the dip. You notice the spice, but it’s subtle. I thought the dip was delicious when I made it, but it tasted even the better the next day. If you have the time, I would really recommend trying to stick it in the fridge for a few hours and let the flavors mingle.

Smoky Black Bean Dip

Ingredients

  • 2 (15 ounce) cans black beans, drained & rinsed
  • 5 large garlic cloves, coarsely chopped
  • 1/2 onion, coarsely chopped
  • 1 cup loosely packed fresh cilantro (leaves & stems)
  • 2-4 limes, juiced
  • 1/4 cup plain yogurt (I used Greek, you can use sour cream too)
  • 2-4 chipotle chiles in adobo (depending on your heat preference), coarsely chopped
  • 2 teaspoons ground cumin
  • 1 teaspoon red chili powder
  • 1 teaspoon smoked paprika
  • salt and freshly ground pepper, to taste

Instructions

  1. In a food processor, combine all ingredients except salt & pepper, and process until smooth. Taste for seasoning, add salt & pepper to taste, and if you prefer a thinner dip, continue processing, adding lime juice 1 tablespoon at a time until desired consistency is reached.
  2. Garnish with 2 Tbsp. of chopped cilantro (if desired) before serving.

Roasted Garlic Guacamole

Roasted Garlic Guacamole

It took me nearly a quarter century to realize that avocados weren’t absolutely vile, disgusting and gross. Up until the time I was about 24, I would act like a three year old anytime an avocado came near my food. If avocado or guacamole touched anything, I refused to eat it. Luckily I have since learned the error of my ways and have grown to love guacamole (I’m still working on plain avocado (it’s totally a texture thing)). This is an ever so slight twist on my favorite guacamole recipe and I have to say it’s pretty amazing.

This guacamole recipe is not for the faint of heart. If you don’t love garlic, you should just skip this one, but if you’re like me and insist on adding inappropriate amounts of garlic to everything, this will be the perfect guacamole for you! Roasting garlic might seem like a bit of a hassle to do, but really it couldn’t be easier! And trust me, it’s definitely worth it. The extra flavor it brings to the guac is out of this world.

Roasted Garlic Guacamole

Ingredients

  • 2 whole garlic bulbs
  • 3 large avocados
  • 2-4 limes
  • 1/2 large red or white onion, diced
  • 3 Tablespoons chopped fresh cilantro
  • 2 roma tomatoes, diced
  • 1 jalapeño, finely diced (include seeds if you want heat!)
  • Kosher salt and freshly ground pepper, to taste (be generous)

Instructions

To Roast Garlic:
  1. Heat oven to 400. With a sharp knife, chop off top 1/4 to 1/3 of garlic head, so that the bulbs are exposed. Place in small oven safe dish. Drizzle with olive oil and season with salt and pepper. Cover with aluminum foil and roast in a 400 degree oven for 45 minutes.
For the Guacamole:
  1. Cut avocados in half, remove pit and scoop out flesh into large bowl. Squeeze in lime juice. Remove all the garlic cloves from bulbs and add to bowl. Mash together (you can use a wooden spoon, fork, potato masher, etc.).
  2. Add cilantro, onion, tomato, jalapeño, and salt and pepper. Mix together until all the ingredients are well incorporated. Feel free to add more lime juice or salt and pepper to taste.

Champagne Lemonade

Champagne Lemonade

You need to make this cocktail for your 4th of July parties! This is definitely one of the best drinks I have made in a while. It tastes like summer in a glass, well that is if summer tasted like champagne and lemonade in a mason jar. It’s perfect for a hot summer evening. The lemonade makes the drink tangy and refreshing and the champagne adds a bit of delightful sparkle. Best of all, it is so, so easy to make! You could definitely use store-bought lemonade, but I’m a fan of the homemade agave nectar sweetened variety. I like to keep it on the tangy side, but using agave makes it easy to adjust the sweetness very easily. Using agave also means you don’t have to wait for water to boil and simple syrup to cool, which means you will enjoying this delicious beverage all the faster!

Champagne Lemonade

  • 1 bottle VERY chilled brut sparkling wine (cheap stuff is fine)
  • 3 cups VERY chilled fresh squeezed lemonade (my favorite recipe is below)
  • berries/fruit of choice (fresh or frozen will help keep it chilled)

Instructions

  1. In a large pitcher (big enough to fit 6 cups) combine the sparkling wine, lemonade and 2 large handfuls of fresh berries. Lightly stir to mix. Serve immediately.


Agave Sweetened Lemonade

  • 10 large lemons, juiced(should yield about 3 cups of juice)
  • 1/4 cup agave nectar
  • 3 cups water

Instructions

  1. Combine lemon juice, agave nectar, and water in a large pitcher. Mix will to combine. Place in fridge and allow to chill.

Red, White & Blue(berry) Quinoa Salad

Red, White & Blue(berry) Quinoa Salad

I think this salad is a perfect for any 4th of July picnic or barbecue. Not only are the colors fun and spot on for the holiday, the ingredients are absolutely fantastic together! The salty blue cheese, earthy quinoa and sweet blueberries each bring great flavors that manage to complement each other perfectly.

I used balsamic raspberry vinegar, which unfortunately muddled the color of the quinoa and blue cheese a bit. I know if I used a little vinegar (white wine, cider) the color would be perfect. I also found the raspberry balsamic to be a bit too sweet for my personal taste. The tangy blue cheese helped tone it down slightly, but I think I would try a less sweet vinegar next time.

Red, White & Blue(berry) Quinoa Salad


Red, White & Blue(berry) Quinoa Salad
Adapted from here.

For the Dressing

  • s5 Tablespoons balsamic raspberry vinegar (or vinegar of choice)
  • 1-2 Tablespoons olive oil
  • Kosher salt and freshly ground pepper, to taste
For the Salad:
  • 1 cup uncooked red quinoa
  • 2 cups low sodium vegetable broth (or water)
  • 1 pint fresh blueberries
  • 8 ounces fresh raspberries
  • 8 ounces blue cheese, crumbled
  • 3 Tablespoons fresh chives, finely chopped
  1. Before cooking the quinoa, soak it in some cold water (about 20 minutes) to rinse off some of its natural bitterness.
  2. Add quinoa and broth to small saucepan. Bring to a boil, reduce heat to a simmer and cook until all the broth has been absorbed and the quinoa is tender (about 15 minutes).
  3. While the quinoa is cooking, mix the dressing together and set aside.
  4. Add the blue cheese, chives and place this in with all the blueberries into a large bowl.
  5. Once you drain the quinoa, cool it off till it is slightly warm or room temperature and pour the raspberry vinaigrette and mix that through.
  6. Let the quinoa cool down some more before mixing in the cheese, blueberries and chives (otherwise your blue cheese will melt.)
  7. Gently fold in raspberries before serving, being careful not to smush them.

Gluten Free Brownies for 4th of July & a GIVEAWAY!

Betty Crocker Gluten Free Brownies

Life gets really busy sometimes. Between school, finals, trips (SF and DC, so fun), sick dogs, computers dying, volunteering and more school, something had to give. Unfortunately that thing was blogging. I’ve still been cooking and photographing and going to farmers’ market every weekend, but there just don’t seem to be enough hours in the day for getting around to writing and editing.

I really don’t want to talk about how it is July in a week, but considering one of my favorite holidays is on the 4th of July, I suppose we must. Just because life is super busy, doesn’t mean I don’t want to cook and bake as much as I normally would.  Sometimes everyone could use a little help in the kitchen. I have used Betty Crocker gluten free mixes before and I have to say I love them. I’ve used tried the yellow cake mix, the devil’s food cake and now the brownie mix. They have turned out perfectly every single time.

MyBlogSpark sent me an awesome baking tool set with a rolling pin, pastry brush, spatula, and timer, and an 8″ Square Cake Pan. The rolling pin, brush and spatula are all my favorite color, so I was pretty excited about that as well. I got even more excited when I noticed the pastry brush and spatula have a built in rest! No more goopy batter on the counters! Genius!  The best part of this My Blog Spark campaign for General Mills, is that I get to give away the same gift set to one of my readers! This gift set includes products from  Joseph Joseph.  One lucky winner will receive an adjustable wooden rolling pin, spatula, pastry brush, timer, and baking pan. And since I love a good giveaway, I’m also including an apron and a box of Betty Crocker gluten free mix to break in your new pan. See entry details below!

Betty Crocker Gluten Free Brownies

Enter the giveaway here:a Rafflecopter giveaway Giveaway info:

  • To enter, use a Rafflecopter giveaway (it’s super easy!)
  • Winner will be selected via Rafflecopter.
  • The giveaway will close Monday, July 1 at midnight (Pacific Standard Time).
  • Giveaway open to US residents only. (Sorry international readers!)

Disclosure: The information and prize pack have been provided by General Mills through MyBlogSpark. All thoughts and opinions are my own.

Good luck! 🙂

Betty Crocker Gluten Free Brownies


Gluten Free Brownies for 4th of July
Recipe from Betty Crocker.

  • 1 box Betty Crocker® Gluten Free brownie mix
  • Butter and eggs called for on brownie mix box
  • 1 package (8 oz) cream cheese, softened
  • 1/3 cup sugar
  • 1/2 teaspoon vanilla
  • 3-4 cups mixed fresh red and blue berries (strawberries, raspberries, blueberries, blackberries)

Instructions

  1. Heat oven to 350°F (or 325°F for dark or nonstick pan). Grease bottom only of 8X8 baking pan with cooking spray.
  2. In large bowl, stir brownie mix, butter and eggs until well blended. Spread in pan.
  3. Bake 28-31 minutes or until toothpick inserted into middle of pan comes out clean or almost clean. Cool completely, about 1 hour.
  4. In small bowl, beat cream cheese, sugar and vanilla with electric mixer on medium speed until smooth. Spread mixture evenly over brownie base. Arrange berries over cream cheese mixture. Refrigerate about 1 hour or until chilled. Cut into squares. Store covered in refrigerator.


St. Patrick’s Day Sides: Oven Roasted Asparagus with Garlic Brown Butter

First asparagus of the season. Oven roasted with garlic brown butter. I love #spring!

I was quite happy to find asparagus everywhere at farmers’ market last weekend. I love asparagus, especially during the spring when it’s super thin and not gross and woody. Roasting just about any vegetable makes it about 100 times better in my book and asparagus is no exception. Roasting the asparagus give it a little crispy crust to the tips that is just amazing. While not a traditional Irish side dish, it’s green, seasonal and delicious. It’s also one of the simplest side dishes in the world. Perfect for a quick, weeknight dinner or a fancy dinner party.

This dish is adapted from my balsamic roasted asparagus, but I made an amazing garlic brown butter sauce instead of the balsamic. As much as I love balsamic, it is a bit harsh and very overpowering. I think the garlic brown butter sauce works with a lot more dishes.

Excuse the Instagram photo, I wasn’t planning on posting this originally, but it turned out too delicious not to. 

Oven Roasted Asparagus with Garlic Brown Butter

For the Asparagus:

  • 2 pounds fresh asparagus, woody stems removed
  • cooking spray
  • kosher salt and freshly ground pepper, to taste
For the Brown Butter Sauce:
  • 4 Tablespoons unsalted butter
  • 6+ garlic cloves, minced (I used a whole head, but I’m crazy)
  1. Heat oven to 400F/200C.
  2. Arrange the asparagus on a rimmed baking sheet. Spray lightly with cooking spray until coated and season with salt and pepper.
  3. Place the asparagus in the oven and roast for 12 to 15 minutes, or until tender and just starting to crisp.
  4. While the asparagus is in the oven, melt the butter in a saucepan over medium heat. Once the butter is almost completely melted, add in the minced garlic. Stir to coat. Allow the garlic to cook until crispy, stirring occasionally so the butter and garlic don’t burn.
  5. When the asparagus is done, place in serving dish and pour garlic and butter over. Serve immediately.

St. Patrick’s Day Side Dishes: Horseradish & Scallion Mashed Potatoes

Irish Beef Stew

Look beyond the Irish Beef Stew and let’s talk about the potatoes. I’m Irish. I love potatoes. I’m basically a potato expert. While I have nothing against tried and true, plain mashed potatoes, sometimes you just need to spice things up a bit. I like horseradish quite a lot and horseradish is quite nice with beef dishes. I knew I was going to like these, but I was very pleasantly surprised about how well the horseradish went with the stew. The horseradish really brought out the best of the flavors on the stew. I think these potatoes would be the perfect side dish to any St. Patrick’s Day meal

Horseradish & Scallion Mashed Potatoes

  • 2 pounds Yukon gold potatoes
  • Kosher salt
  • 1/2 stick softened butter or 1/4 cup extra-virgin olive oil
  • 1 cup milk
  • Freshly ground pepper
  • 2+ tablespoons prepared horseradish (I think more is better)
  • 1/2 cup to 3/4 cup chopped scallions
  1. Put the potatoes in a saucepan; cover with cold water and add 2 tablespoons kosher salt. Bring to a simmer over medium-low to medium heat and cook, uncovered, until tender, about 45 minutes. Drain the potatoes and let sit until just cool enough to handle, then peel and transfer to a bowl.
  2. Add the butter/oil to the potatoes. Add the milk, 2 teaspoons kosher salt, and pepper to taste; mash with a potato masher or large fork.
  3. Fold in the horseradish and half the scallions. Spoon the mashed potatoes into a serving dish and sprinkle with the remaining scallions.

Thirsty Thursday: Irish Buck (with Homemade Ginger Ale!)

Irish Buck Cocktail

So many of St. Patrick’s Day’s drink options involve Guinness, which can be a bit disappointing if you have to avoid gluten. I know whiskey isn’t everyone’s favorite, but this drink is so light, slightly sweet, a bit fruity and really reminiscent of a Moscow Mule  that you might not even notice the whiskey. The other reason I like this cocktail so much is it is so, so simple. Simple is better sometimes, especially on a festive day.

I went a little wild and decided to use homemade ginger ale… It was received with mixed reviews. I found it too sweet and too gingery, but I watered it down a bit more and it started to grow on me. I have ventured into the world of homemade sparkling beverages after getting a Sodastream for Christmas. I love it. It is amazing And there are endless possibilities.

Irish Buck

  • 2 ounces Irish whiskey
  • 1 lime, juiced
  • 3 ounces ginger ale (recipe for homemade follows)
  • Lime wedge, for garnish
  1. Fill a lowball glass with ice. Add whiskey, lime juice, and ginger ale. Stir and garnish with a lime wedge.

Homemade Ginger Ale

Ginger Syrup

  • 1 cup peeled, finely chopped ginger
  • 2 cups water
Simple Syrup
  • 1/2 cup sugar
  • 1 cup water


  • Club soda (I used water from my Sodastream)
  • Lime juice
  • Lime wedges
  1. Bring 2 cups of water to a boil in a saucepan. Add ginger. Reduce heat to medium low and let ginger sit in the simmering water for 5 minutes. Remove from heat and let sit for 20 minutes. Strain liquid through a fine mesh strainer. Discard ginger pieces.
  2. In a separate saucepan, make the Simple Syrup by dissolving 1 cup granulated sugar into 1 cup of boiling water. Set aside.
  3. Make individual (tall) glasses of ginger ale by mixing 1/2 cup of ginger water with 1/3 cup of Simple Syrup and 1/2 cup of club soda. Add a few drops of fresh lime juice and a lime wedge to each glass.

Mustard Glaze Corned Beef

Mustard Glazed Corned Beef

Even though I’ve posted two beef recipes in a row, I am generally pretty picky about my red meat. I usually only eat red meat on the rare (pun!) occasion I go to a steakhouse (NY strip, medium please). Red meat in general, and steaks to be exact, are the one thing I have yet to find and master a go-to, fail-proof recipe (quality beef is too expensive to experiment with). Brisket would be the one exception to the red meat rule. I can make a mean brisket. I did learn from the best. Mama CC makes the best corned beef I have ever had. Yes, I am completely biased, but really her recipe is wonderful. So wonderful I need to share it.

The special secret to her corned beef is the amazing mustard glaze she puts on top before serving. It’s delicious. There is something about the sweet, slightly caramelized mustard and the combination of salty corned beef that is out of this world. If you really want to impress any St. Patrick’s Day guests, I highly recommend this recipe. I would also recommend serving with a horseradish sour cream sauce on the side. It’s the perfect finishing touch.

Mustard Glaze Corned Beef

For the Corned Beef:

  • 3-5 pounds corned beef (with spice packet or brine, if included), trimmed of excess fat
  • 12 ounces pale ale/light beer or low-sodium beef broth
  • 1 large onion, quartered
  • 2 large carrots, peeled and cut in half
  • 4 cloves garlic, smashed
  • 2 dried bay leaves
For the Glaze:
  • 1/2 cup grainy mustard
  • 1/4 cup packed brown sugar (dark or light, doesn’t matter)
  1. Place corned beef in a large pot. Add the beer/broth, onion, garlic, carrots, bay leaves, 1 1/2 cups water and the contents of the spice packet/brine, and bring to a boil. Reduce heat and simmer, covered, until very tender and easily pierced with a fork, 2 1/2 to 3 hours.
  2. Heat oven to 375ºF. Transfer the beef to a foil-lined baking sheet.
  3. Meanwhile, in a bowl, combine the mustard and sugar. Brush the beef with the mustard mixture and roast until the sauce has thickened and set slightly, 12 to 15 minutes. Transfer the beef to a cutting board and let sit 5-10 minutes. To serve, slice thinly across the grain.

Slow Cooker Irish Beef Stew

Irish Beef Stew


This stew is the perfect alternative to corned beef on St. Patrick’s Day, especially if you don’t have all day to cook. Slow cooker recipes are great for entertaining a crowd.

Some people put potatoes into their stew, which I think is just a waste of perfectly good potatoes. Stew just cries out for creamy mashed potatoes. I made a delicious horseradish and green onion mash, which was absolutely amazing with the beef and the broth of the stew.

One other note about the onions… I got a new crockpot recently and for whatever reason it does not like cooking onions unless they have already been softened a bit. To make this stew turn out, I sautéed the onions in the same pan I browned the beef in and deglazed it after all that. If your slow cooker isn’t as moody, feel free to skip that step, but it really does help add some extra flavor to the stew.

The result is a great combination of tender beef, wonderfully flavored veggies and the broth is so flavorful I can’t even put it into words. The broth and potatoes I used to sop it up were probably my favorite part.


Slow Cooker Irish Beef Stew

  • 2 Tablespoons olive oil, divided
  • 2 Tablespoons unsalted butter, divided
  • 1 1/2 pounds stew meat,
  • 2 Tablespoons all-purpose flour (I used Bob’s Red Mill GF Blend)
  • 1/2 Tablespoon garlic powder
  • 1 teaspoon smoked paprika
  • kosher salt & pepper, to taste
  • 4 large carrots, peeled & cut into 1/2 inch pieces
  • 1 large onion, diced
  • 4-8+ cloves garlic, minced
  • 1/2 cup frozen peas
  • kosher salt & pepper, to taste
  • 1 large bay leaf or 2 small
  • 1 (6 ounce) can tomato paste
  • 1 Tablespoon Worcestershire sauce
  • 1 1/2 cups beef broth
  • 1/2 cup rich red wine (I used Pinot Noir)
  1. Place the carrots and peas into the crockpot.
  2. Rinse the meat and pat dry with paper towels. Cut into 1 inch pieces. Toss and coat beef with flour, garlic powder, paprika and salt and pepper, to taste. (I recommend using a large bowl or large plastic bag.)
  3. In a large skillet, heat 1 Tablespoon olive oil and 1 Tablespoon of butter over medium-high heat. Add beef and sauté in batches until brown on all sides, about 5 minutes per batch. Add more butter and oil as needed and make sure not to over crowd the pan. When beef is browned, add to crock pot.
  4. When done browning the beef, add in onion, sauté until softened and starting to brown. Add in garlic and brown until fragrant, about 1-2 minutes. Use a generous drop of beef stock or wine to deglaze the pan and add everything to the crock pot.
  5. Add the rest of the ingredients (bay leaf, tomato paste, Worcestershire sauce, broth, wine) to the crock pot. Stir together.
  6. Cook on high for 4-6 hours or 6 to 9 hours on low.